AssetManage allows you to customize your own reports.
: Creating Custom Reports
If the report you are creating is similar to one already in the program, Select Reporting > Edit Report... from the main menu and choose the report. Then save the report under a different filename and start making changes.
AssetManage also includes a Create Assets Report... feature. Use it to create simple asset reports.

Select Reporting > Create Assets Report... and the following window will appear:
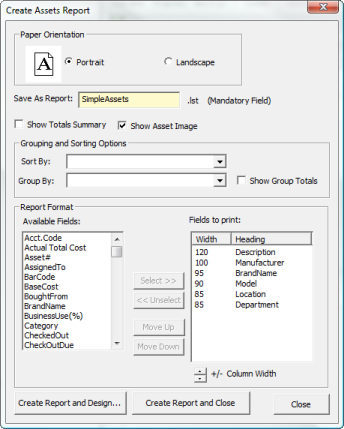
The Save As Report field is mandatory, enter a name for the new report there. The Create Report and Design... button will bring up the Report Designer with the new report in edit mode. The Create Report and Close button will create the report and save it to the AssetManage reports folder.
AssetManage also has a New Report Wizard command that is useful in some instances.
From the Reporting menu, select New Reports Wizard. The Project Wizard will appear, directing you through the steps to create a new project:
| 1. | Set print options and paper size |
| 2. | Set options for page numbering and title: |
| 3. | Choose table options and summary |
| 4. | Choose the data for the list |
| 5. | Create Your Report, proceed to the Label and Report Designer. |
For more information on using these steps, see Step-by-Step Example: Report