: Check Out Tools or other Equipment to an Employee
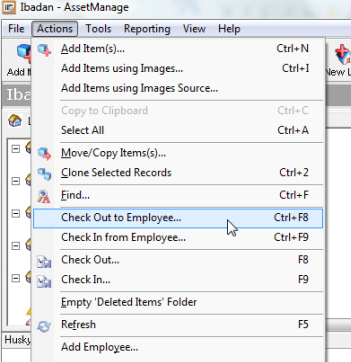
Select ACTIONS > CHECK OUT TO EMPLOYEE... from the main menu or Ctrl+F8 on your keyboard.
Process check out transactions automatically with a barcode scanner.
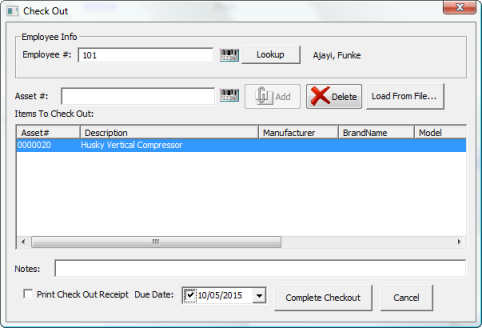
1/ Scan the employee's barcode number from the employee badge or enter it manually in the Employee # field. The employee name will be shown.
2/ Scan or enter the asset #'s for the items to be checked out to the employee.
3/ Press the Complete Checkout button to finish
To Check Out or Check In a single asset first select the asset and the right mouse click. Choose Check In or Check Out from the popup menu.
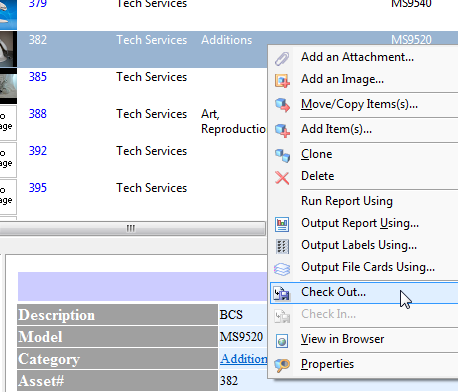
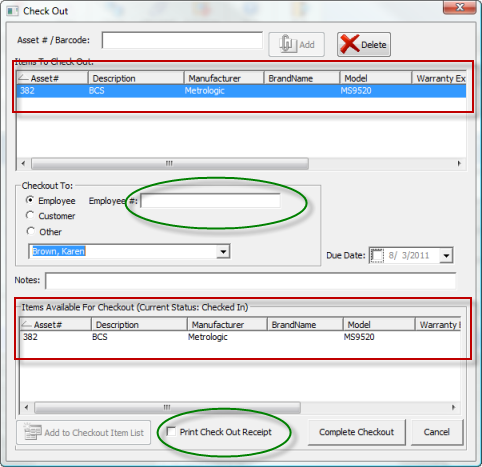
The Check Out or Check In dialog will appear with the asset already selected. Another list will contain a list of assets with the current status "Checked In" that you can add to the Items to Check Out list. Use the Employee # field to scan an employee badge that would contain the employee number in barcode format. The Print Check Out Receipt checkbox will result in a check out receipt being printed once the Complete Checkout button is selected.
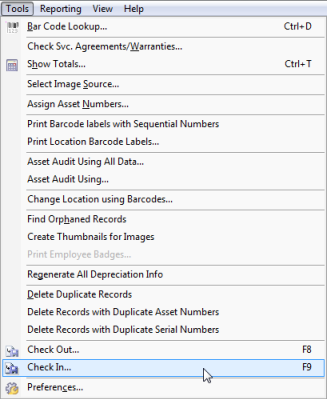
The Check In or Check out feature can also be selected from the main menu (Tools > Check In...) or using the F9 key in the case of a check in.
The Check In dialog window will appear with a list of assets that currently have the status "Checked Out". Select the assets that should be checked in and then press the OK button.
: Batch Check Out / Check In using a text file
AssetManage supports batch check out / check in using a simple text file. The text file must be formatted with one asset per line.

Use the Load From File... button in the Check Out or Check In dialog to choose the text file

This feature is useful with PDA-type barcode scanners. Most of these scanners will allow the scanning of multiple asset tags, which can then be exported to a PC as a text file.
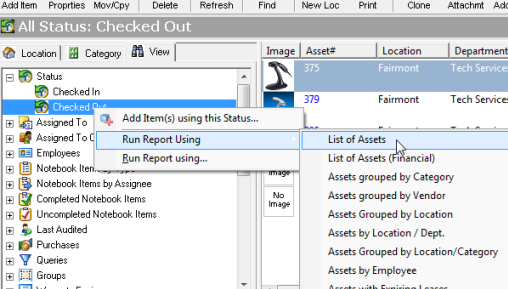
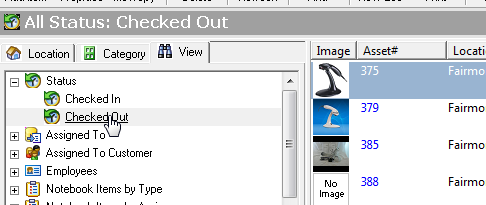
AssetManage makes it easy to view all assets with a particular status such as all Checked Out items. Open the View tab and then expand the Status section as seen in the screenshot below.
To run a report that only contains assets with a particular status such as "Checked Out", simply right mouse click on the status and then select the report from the popup menu.